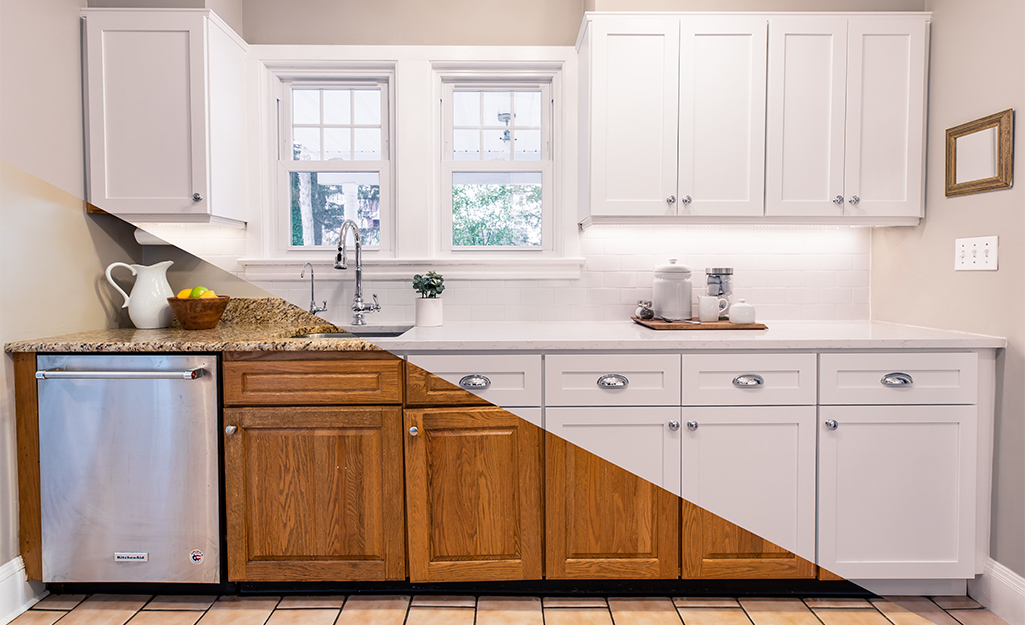
Are your kitchen cabinets looking tired or outdated? Changing your kitchen cabinet doors is one of the quickest and most cost-effective ways to give your kitchen a fresh new look without a full remodel.
Whether you want a modern style, a classic feel, or just want to brighten up your space, swapping out cabinet doors can transform your kitchen in just a few simple steps. You don’t need to be a professional or spend a fortune to do it yourself.
In this guide, you’ll discover exactly how to change your kitchen cabinet doors with easy-to-follow instructions, helpful tips, and tricks to make the process smooth and stress-free. Ready to upgrade your kitchen? Let’s dive in and make your cabinets the star of the room!

Credit: www.youtube.com
Materials And Tools
Before starting to change your kitchen cabinet doors, gather the right materials and tools. This step makes the process smooth and efficient. Choosing the correct door material affects the look and durability of your cabinets. Having the required tools on hand saves time and frustration. Consider optional hardware upgrades for a fresh, modern touch.
Choosing Door Material
Select cabinet doors that fit your kitchen style and budget. Solid wood offers strength and a classic look. Medium-density fiberboard (MDF) is smooth and easy to paint. Thermofoil doors provide a sleek finish and resist moisture. Think about durability, maintenance, and appearance when choosing materials.
Required Tools
Prepare these tools before you start. A screwdriver or drill removes and attaches hinges. A tape measure ensures precise fitting. A level helps to align doors perfectly. A pencil marks drilling spots. Safety glasses protect your eyes during work. Having these tools ready makes the job easier.
Optional Hardware Upgrades
Upgrade your cabinet doors with new hardware for a fresh look. Modern handles and knobs add style and comfort. Soft-close hinges prevent slamming and reduce noise. Magnetic catches keep doors firmly closed. Consider these upgrades for better function and design.
Preparing Cabinet Doors
Preparing cabinet doors is the first key step in changing kitchen cabinet doors. Proper preparation helps avoid mistakes and saves time. It involves measuring your current doors, labeling them, and removing old doors and hardware carefully.
Each step requires attention to detail. Accurate measurements ensure new doors fit perfectly. Labeling helps keep track of each door and its place. Removing doors and hardware properly protects your cabinets and makes installation smooth.
Measuring And Ordering Doors
Measure the height and width of each cabinet door with a tape measure. Write down the exact dimensions. Measure from edge to edge, including any trim or molding. Double-check your numbers to avoid ordering the wrong size.
Order new doors based on your measurements. Choose pre-drilled doors to save time on hinge installation. Pick materials that match your kitchen style, like wood or MDF. Ordering the right size and type ensures a smooth upgrade process.
Labeling Old Doors And Cabinets
Use masking tape to label each door and its cabinet frame. Write matching numbers or letters on the tape. This helps you know which door belongs to which cabinet during reinstallation. Without labels, doors can get mixed up, causing delays and confusion.
Place labels on the inside or back of doors to keep them hidden. Also, label the cabinet boxes clearly. Keep the labels intact until all new doors are installed. This simple step saves time and effort later.
Removing Old Doors And Hardware
Use a screwdriver to remove screws from cabinet hinges. Support the door with one hand to prevent it from falling. Gently pull the door away from the cabinet frame. Place old doors in a safe spot to avoid damage.
Remove the old hinges and other hardware like handles or knobs. Keep screws and hardware if you plan to reuse them. Proper removal protects your cabinets and prepares them for the new doors.
Installing New Hinges
Installing new hinges is a key step in changing kitchen cabinet doors. Proper hinge installation ensures your doors open smoothly and stay aligned. This section guides you through attaching hinges to doors, using a hinge jig, and making sure hinges are square.
Attaching Hinges To Doors
Start by placing the hinge on the door edge. Align it with the pre-drilled holes or mark new spots. Use a screwdriver or drill to secure screws tightly. Avoid over-tightening to prevent wood damage. Repeat for each hinge on every door.
Using A Hinge Jig
A hinge jig helps drill precise holes for hinges. Position the jig on the door edge following the tool’s instructions. Clamp it firmly to keep it steady. Drill holes through the jig guides to ensure accuracy. This tool saves time and avoids mistakes.
Ensuring Hinges Are Square
After attaching hinges, check they are square. Use a carpenter’s square or try closing the door to see if it fits well. Adjust screws slightly to fix any misalignment. Properly squared hinges make cabinet doors operate smoothly and look neat.
Credit: www.homedepot.com
Mounting New Doors
Mounting new kitchen cabinet doors is a key step in updating your kitchen’s look. Proper mounting ensures doors open smoothly and align perfectly. Take your time with this process for the best results. Follow these simple steps to install new doors confidently and correctly.
Positioning Doors Correctly
Hold the door against the cabinet frame. Make sure edges line up evenly on all sides. Check the gap between doors and cabinet edges to keep it uniform. Adjust the door height so it sits level. Proper positioning prevents rubbing and uneven wear over time.
Using Clamps For Support
Use clamps to hold the door steady while attaching hinges. Clamps free your hands for screwing and adjusting. Choose clamps that fit the door size without causing damage. Secure the door tightly but gently to avoid shifting. This step helps keep the door in place for accurate hinge placement.
Securing Hinges To Cabinets
Attach hinges to the cabinet frame first if possible. Line up hinge holes with pre-drilled spots on both door and frame. Use a screwdriver or drill with the correct bit to fasten screws firmly. Avoid over-tightening to prevent wood damage. Test the door by opening and closing it smoothly after securing hinges.
Adjusting Door Alignment
Proper door alignment is essential for a polished look and smooth operation of your kitchen cabinets. Misaligned doors can cause uneven gaps, rubbing, and damage over time. Adjusting door alignment ensures each door fits perfectly and functions well.
This step improves the overall appearance and helps your new cabinet doors last longer.
Aligning Door Gaps
Check the gaps between cabinet doors and frames first. Uniform gaps create a clean, balanced look. If gaps are uneven, adjust the door position by loosening hinge screws slightly.
Move the door until the gaps are equal on all sides. Tighten screws carefully to hold the door in place. Repeat for each door to maintain consistency throughout the kitchen.
Fine-tuning Hinge Screws
Hinges allow small adjustments to door height, depth, and side-to-side movement. Use a screwdriver to turn the screws slowly. One screw controls the door’s horizontal position, another adjusts height, and the third controls depth.
Make small turns and check the door’s alignment after each adjustment. Adjusting hinges improves door fit and prevents rubbing or sagging. Take your time for precise results.
Installing Rubber Bumpers
Rubber bumpers cushion the cabinet doors and reduce noise when closing. They also protect doors from damage by preventing hard contact with the frame. Peel the backing off the bumpers and stick them inside the cabinet corners or on door edges.
Place bumpers where doors make contact with the frame. This simple addition improves door function and extends cabinet life.
Finishing Touches
After installing your new kitchen cabinet doors, focus on the finishing touches. These details give your kitchen a polished, fresh look. Simple steps here improve both function and style. Pay attention to handles, cleaning, and regular care. This keeps cabinets looking great for years.
Installing New Handles And Knobs
Choose handles or knobs that match your kitchen style. Use a drill to create holes if they are not pre-drilled. Align hardware carefully for a balanced look. Screw handles and knobs tightly to avoid loosening over time. New hardware can instantly update the cabinet’s appearance and improve grip.
Cleaning And Inspecting
Clean all cabinet surfaces with a gentle cleaner. Remove dust, fingerprints, and smudges for a fresh finish. Inspect hinges and screws to ensure they are secure. Check for any scratches or chips on doors. Fix small flaws quickly to prevent further damage and keep your cabinets looking new.
Maintaining Cabinet Doors
Wipe cabinet doors regularly to prevent grime buildup. Avoid harsh chemicals that can damage finishes. Tighten handles and hinges as needed to maintain function. Use soft cloths to protect the surface during cleaning. Routine care extends the life of your kitchen cabinets and keeps them beautiful.
Cost And Time Considerations
Changing kitchen cabinet doors requires planning for both cost and time. These factors affect the overall success of your project. Understanding expenses and time-saving options helps you make smart decisions. This section covers key points on cost and time considerations for replacing cabinet doors.
Estimating Replacement Costs
Replacement costs vary based on door material and style. Solid wood doors cost more than MDF or laminate options. Custom doors raise the price, while stock doors are cheaper. Budget also includes hardware like hinges and handles. Expect to spend between $100 to $500 per door. Labor costs add if hiring professionals, increasing total expenses.
Saving Time With Pre-bored Doors
Pre-bored doors have holes drilled for hinges and handles. These doors save time during installation. You avoid measuring and drilling by hand. Pre-bored doors reduce errors and speed up the process. They come ready to fit most standard cabinets. Choosing pre-bored options helps finish your project faster and easier.
Diy Vs Professional Help
Doing it yourself cuts labor costs but takes more time. DIY requires tools, skills, and patience. Mistakes might cause delays or extra costs. Hiring a professional costs more but saves time and effort. Experts ensure proper fit and finish quickly. Consider your skill level and budget before deciding. Both options have pros and cons based on your situation.
Common Mistakes To Avoid
Changing kitchen cabinet doors can refresh your kitchen’s look. Mistakes during this process cause delays and extra work. Avoid common errors to save time and effort. Focus on key areas like screws, hinges, and door alignment. These tips help keep your project smooth and successful.
Avoiding Stripped Screws
Use the right screwdriver size for the screws. Turning screws too fast can strip them. Apply steady pressure while turning screws. If a screw feels stuck, stop and check. Stripped screws make door installation difficult and weak.
Ensuring Consistent Hinge Placement
Measure hinge locations carefully before drilling. Mark spots with a pencil to keep them even. Use a template or guide for uniformity. Inconsistent hinge placement causes doors to hang unevenly. Double-check measurements to avoid mistakes.
Preventing Door Misalignment
Install doors loosely first to adjust their position. Check door gaps and alignment before tightening screws. Small adjustments prevent doors from rubbing or sticking. Use a level to keep doors straight. Misaligned doors affect your kitchen’s look and function.

Credit: www.youtube.com
Frequently Asked Questions
Can You Just Change Out Kitchen Cabinet Doors?
Yes, you can change just the kitchen cabinet doors. Remove old doors, install new ones with hinges, and adjust for a perfect fit.
What Is The Typical Cost To Replace Kitchen Cabinet Doors?
The typical cost to replace kitchen cabinet doors ranges from $2,000 to $5,000. Costs vary by material, size, and labor. Solid wood doors cost more, while MDF offers a budget-friendly option. Custom designs increase prices. DIY installation lowers expenses, while professional services add fees.
How Can I Update My Kitchen Cabinet Doors Without Replacing Them?
Update kitchen cabinet doors by sanding and repainting or staining them. Replace old hardware with modern handles and hinges. Add decorative trim or adhesive veneers for a fresh look. These simple changes refresh cabinets without full replacement.
What Is The Average Cost To Replace Kitchen Cabinet Doors?
The average cost to replace kitchen cabinet doors ranges from $1,000 to $4,000. Prices vary by material and labor. Solid wood doors cost more than MDF or laminate. Custom designs increase expenses. DIY replacement reduces costs significantly compared to hiring professionals.
Conclusion
Changing kitchen cabinet doors can refresh your space quickly and affordably. Follow each step carefully for the best results. Take your time removing old doors and labeling them well. Use quality materials for durability and a neat finish. Proper hinge alignment ensures smooth door operation and a polished look.
Small adjustments make a big difference in appearance. Enjoy your updated kitchen with a fresh, clean style. This simple project adds value without a full remodel. Try it yourself and see how easy it can be.